Showing posts with label WEB DISPATCHER. Show all posts

HOW TO SAP - SAP Web dispatcher Installation

  1. Login with adm.                                                                                                                           
  2. Create folder SAPWEBDISP in usr\sap\

     
  3. Download latest web dispatcher from services.sap.com and save it to above folder
  4. To extract the file > Start > Run > Cmd > Browse to SAPWEBDISP folder
  5. Execute sapcar –xvf sapdispatcher.sar

  6. Create a profile by executing: sapwebdisp.exe –bootstrap
  7. You will be prompted for some details.
  8. Hostname: 
  9. http_port : 8100 <-- this might differ, 00 is the instance having a messager server


  10. Unique Instance number: 88 (any number)
  11. Http port number for SAP Web Dispatcher: 80 <-- default port for landing page
  12. Create configuration for : medium (default)
  13. Once complete, browse to SAPWEBDISP folder and edit sapwebdisp.pfl
  14. #SAP Web Dispatcher Ports
    icm/server_port_0 = PROT=HTTP,PORT=80,TIMEOUT=180, PROCTIMEOUT=3600
  15. # SAP Web Dispatcher Web Administration
    icm/HTTP/admin_0 = PREFIX=/sap/wdisp/admin,DOCROOT=./admin,AUTHFILE=icmauth.txticm/HTTP/redirect_0 = PREFIX=/, TO=/sap/bc/gui/sap/its/webgui/!
  16. Manually create a window service to run web dispatcher.
  17. Start > Run > Cmd > ntscmgr install "SAPWebDisp PRD” -b


  18. Start > Run > Regedit >
  19. HLKM > SYSTEM > CurrentControlSet > services > SAPWebDisp PRD > ImagePath >
  20. Enter:
    F:\usr\sap\\SAPWEBDISP\sapwebdisp.exe service pf=F:\usr\sap\\SAPWEBDISP\sapwebdisp.pfl
    (remember to check your drive and sid)
  21. Exit regedit
  22. Right click on My Computer > Manager > Services >
  23. Restart SAPWebDisp PRD service

SAP Web dispatcher Installation- Unix

  1. Read SAP Note 538405
  2. Read SAP Help:http://help.sap.com/saphelp_nw70/helpdata/en/b4/9aa8862e714e6db8e74e48e5d3283b/frameset.htm
  3. Download the webdispatcher from http://service.sap.com/ ->Support Packages and Patches-> Entry by Application Group-> Additional Components-> SAP Kernel-> SAP Kernel 32 Bit or SAP Kernel 64 Bit-> SAP Kernel 7.01 -> Operating system platform-> Database independent ->The package is called sapwebdisp_<>-<…>.SAR, where <> indicates the patch level
  4. Create a direactory /usr/sap/SID/webdisp on server and copy the downloaded webdispatcher sapwebdisp_35-10006297.sar
  5. Uncar the downloaded file
  6. /usr/sap/SID/SYS/exe/run/SAPCAR -xvf sapwebdisp_35-10006297.sar
  7. chown SIDadm:sapsys *
  8. Run this commnad to install webdispatcher: sapwebdisp.pfl -cleanup -shm_attach_mode 4 -auto_restart -bootstrap
  9. Installation process provide the values to below parameters:
  10. Hostname of Message Server (rdisp/mshost):messageserver hostname
  11. HTTP Port of Message Server (ms/http_port): 81Instance_Number
  12. Unique Instance Number for SAP Web Dispatcher (SAPSYSTEM): Give a unique name
  13. HTTP port number for SAP Web Dispatcher: 280_Instance_Number
  14. Create configuration for s(mall), m(edium), l(arge) system (default: medium): l
  15. At the end you will see this message, SAP Web Dispatcher bootstrap ended (rc=0), ð *** SAP Web Dispatcher up and operational (pid: 12956) ***
  16. Then start the webdispatcher: sapwebdisp pf=sapwebdisp.pfl -checkconfig
  17. Make sure the dispatcher started :
  18. ps -ef grep webdisp
  19. SIDadm 14561 11954 0 16:32:13 pts/2 0:00 grep sapwebdisp
  20. SIDadm 12956 1 0 16:26:29 pts/1 0:01 sapwebdisp pf=sapwebdisp.pfl -shm_attach_mode 6
URL redirect concept –
For redirect (when your client browser will be asked to go to a new URL), below should do, though it is better to use FQDN, like sapwebdisp.corp.com
icm/HTTP/redirect_0 = PREFIX=/ECC/webgui, FOR=sapwebdisp:85, FROM=*,TO=/sap/bc/gui/sap/its/webgui,HOST=saperpecc,PROT=HTTP,PORT=8001 
If you want your client to see http://sapwebdisp:85 URL in the browser, but actual content of http://saperpecc:8001//sap/bc/gui/sap/its/webgui, this would be URL forwarding/routing.
In this case you need to use parameter 
wdisp/server_info_location = info.icr to point to ecc host and also icm/HTTP/redirect_0 to manipulate prefixes ECC/webgui -> sap/bc/gui/sap/its/webgui/ .
We could also use httpurlloc table in ECC instead of info.icr file.
Example of icr file could be:
Version 1.0 ECC J2EE saperpecc 8001 DIA=1 
Only hostname and port are critical, since we are not doing load balancing on this web dispatcher.

Installation and Configuration Strategy


In this page, we will not deal with the Web Dispatcher standalone files, but will focus on the installation of a new system via the SWPM tool (former sapinst), in order to minimize maintenance and configuration difficulties.
Normally the sapwebdisp executable file can be found under the DIR_CT_RUN folder, as it is delivered within the SAPEXE.SAR kernel package.
Here is an example of the path from which the sapwebdisp.exe runs when you use the SWPM method of installation of the Web Dispatcher:
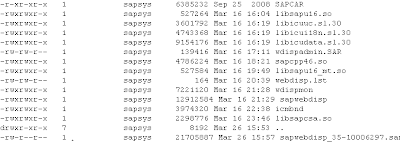
Below is an example of the directory structure created when the installation is finished successfully. Notice that that local instance exe folder will not be created as given in the image below, i.e usr/sap/<SID>/instance/exe will not be present.
 Read the SAP KBA 2400696 for more details.
1) Versions and download information

1.1) Where can I download the Web Dispatcher?


Refer to the SAP note 908097 for official download path from SAP Support portal.

Click 
here to access the Installation guidesClick here to download the Software Provisioning Manager tool (former sapinst tool)

1.1) Which release of the Web Dispatcher should I use?

An official statement about the currently supported and recommended Web Dispatcher version for customers is contained in the SAP note 908097.

2) Perform the Installation

2.1) Start the Software Provisioning tool and select the Web Dispatcher installation.

Note: use the Web Dispatcher release recommended at the SAP note 908097 and the "SWPM....SAR" file (SWPM for NW higher than 7.0x), not the "70SWPM....SAR" file (SWPM for NW7.0x).
Select Custom mode
 

2.2) Select the SAP Web Dispatcher System ID (ID).


Insert and confirm your Master Password


Insert a password for OS system Users 

2.3) Specify the package for the SAP Web Dispatcher installation.

Download the packages as indicated at the SAP note 908097.
The installation screen also has links to the corresponding download pages.

2.4) SAP Host Agent

If the SAP Host Agent is not installed at the server already, the SWPM tool will install it.
Just follow the installation screens.

2.5) Inform the (unique) instance number and (possibly virtual) hostname of the Web Dispatcher

2.6) Provide the backend system ID and the Message Server host and HTTP Port

Note: in a Dual-stack systems, provide the ABAP Message Server settings.

HINT:

To identify the message server port you can access the transaction SMMS, or via the sapmmc choose your ABAP Central Services instance (ASCS), right click on msg_server.exe -> Developer trace:
Find the Message Server HTTP port in the dev_ms file as shown in the picture below. It is possible to open the dev_ms file directly if access to the SAP MMC is not possible. The dev_ms file for the ABAP Message Server is located at:
  • <drive:>\usr\sap\<SID>\DVEBMGS<XX> (path for a "classic Central Instance")
  • <drive:>\usr\sap\<SID>\ASCS<XX> (path for an ABAP Central Services Instance)
 

2.7) Define the SAP Web Dispatcher parameters


The installation can activate the required ICF nodes automatically, at the backend system.
If you wish to do this manually, logon to the backend system, execute the transaction SICF and enable the following nodes:
  • /sap/public/icman
  • /sap/public/icf_info and all services beneath it
  • /sap/public/ping


After the summary, the installation process will begin.

2.8) Run the installation


Related Content

Related Documents

Related SAP Notes/KBAs

SAP note 908097: SAP Web Dispatcher: Release, Installation, Patches, Documentation
SAP KBA 2400696: "kernelVersion is not defined" error during installation with Webdispatcher


Copyright © 2013 VENKAT SAP BASIS